Breeding stick insects and leaf insects is not difficult. If you keep them and care for them properly, they will mate and produce eggs without much effort. You should check the guide on the care for phasmids.
However, to have better breeding success, you need to take some effort in the care for the eggs and nymphs. We describe here the basic principles on how to breed stick insects and leaf insects, together named as phasmids. These notes are based on my own experience breeding several species of phasmids and experiences of my colleagues. Always check for specific detailed information on the species breeding aspects for additional tips and recommendations.
How to begin a breeding group: eggs or nymphs?
First, I like to quickly discuss the best way to start with keeping phasmids. It can be difficult when starting with new nymphs or adults when you receive them from another breeder. An explanation of why it is more challenging to start with older nymphs (from L4) or adults is that possibly phasmids become adapted in the environmental conditions they are previously kept. Transferring to a new home can lead to problems to acclimate to a new environment. It seems that newly hatched nymphs can better cope with such a change in the environment. Also, when sending with parcel shipment can pretty stressful, especially when you realize how some post offices treat the parcels.
For this reason, I highly recommend to start or renew your group with eggs. Eggs can endure and cope better in changing environmental conditions. Another major benefit is that eggs don’t spread diseases easily. Diseases inflicted by viruses, bacteria and fungi are often spread by phasmids and not by their eggs.
On the other hand, for many species, you don’t even need a male to breed. The nymphs are born from parthenogenic females that lay fertile eggs. However, the nymphs that are born from these eggs are often weaker. Also, the eggs seem to need much more time (up to twice the time!) to hatch than fertilized eggs do. So although this strategy may work, it has its downsides. And let’s be honest, it is also really fascinating to see the mating behaviour of stick insects. Once the male and female have mated, a female does not have to mate again to produce fertile eggs. She will remain to lay fertile eggs during the rest of her life. Although matings may still occur, they are not necessary and not harmful to the female.
Have you read the page on the general care of phasmids already?
I highly recommend to first read the page on the general care of stick insects and leaf insects before reading further about how to breed with phasmids.
How to incubate eggs?
As stated before, getting eggs is not the difficult part. Adequate housing and good care, and males and females will do the work. On the page about the biology of phasmids, you can find more information about the phasmid’s life cycle. Soon you can find many eggs in your enclosure. But what then? What is the best way to incubate the eggs?
How you incubate the eggs depends on the species egg-laying method. We can distinguish four ways in how phasmids lay their eggs:
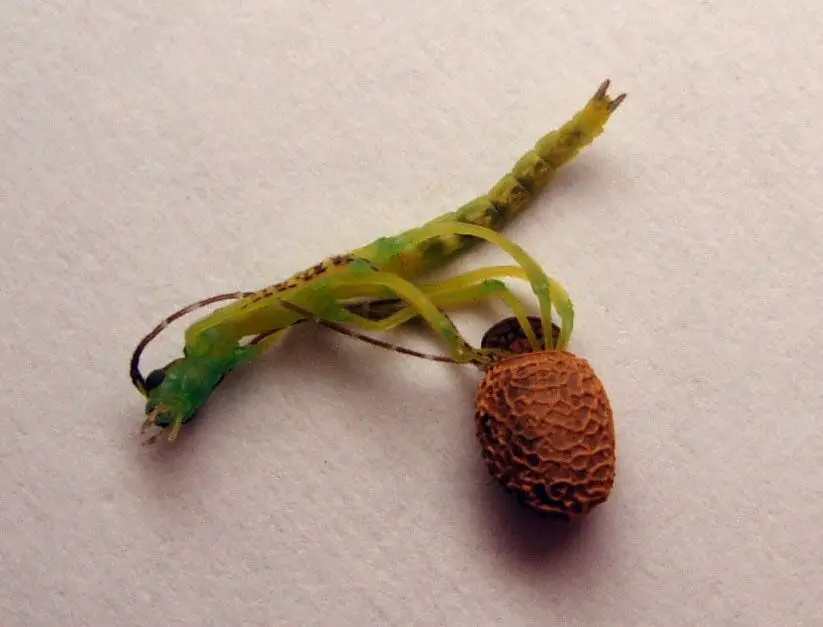
- Egg droppers: The eggs are randomly dropped onto the substrate (e.g. Extatosoma tiaratum, Pharnacia ponderosa, Phyllium philippines).
- Egg buriers: The eggs are buried or ‘drilled’ within the substrate (e.g. Eurycantha calcarata, Heteropteryx dilatata).
- Egg piercers: The eggs are laid in holes pierced in plants (e.g. Asceles spp., Paraloxopsis spp.).
- Egg gluers: The eggs are glued to surfaces of leaves and twigs using a sticky substance (e.g. Marmessoidea spp., Neoclides spp.).
But one thing that is universal with breeding all different species is that we use a specific incubation container setup to incubate and hatch the eggs. Although you can incubate the eggs in the enclosure where the adults are housed, and the females laid its eggs, I still recommend incubating and hatching the eggs in a separate incubation container.
The main reasons that I like to keep eggs and nymphs separated from adults are that you can control the environment without interfering the care for your adult group and better monitor your breeding success.
Creating an incubation setup
In this section, we discuss a method which made me breed several species of stick insects and leaf insects. It is absolutely not the only way to success, but I have good experience with this method, and I like to share it with you.
Incubation container
The type of enclosure you use as an incubation container does not really matter. It can be a small plastic cup or a box, or a glass container with enough ventilation.
We use small glass tarantula enclosures as incubation containers. The size of 20cm x 20cm x 20cm (or 8″x 8″ x 8″) is ideal for this purpose. For bigger phasmid species we use containers of 30cm x 30cm x 30cm (12″ x 12″ x 12″). But you can use just as easy a plastic or acrylic container, Tupperware box or deli food cup, as long as there is enough ventilation, it is large enough for the nymph(s) and newly hatched nymphs can’t escape the enclosure. Additionally, I like to have a door at the front of the enclosure, but top lids work perfectly as well.
I also prefer when the enclosure has fine mosquito mesh on the top. My experience is that many nymphs like a mesh to moult, but some will also use their feed plant to find a location to moult. With plastic containers, you can cut out a large section or multiple sections and cover it with fine mesh, also to provide enough ventilation.
Incubation materials
Which incubation medium or substrate you use depends on the way the females lay their eggs as discussed earlier.
For species that drop the eggs on the ground, you can lay the eggs on the substrate to incubate them. Substrates that work well for this incubation method are kitchen paper, dishcloth, vermiculite and sand. It is better that you don’t use a substrate that contains organic material. This material tends to develop mould quicker.
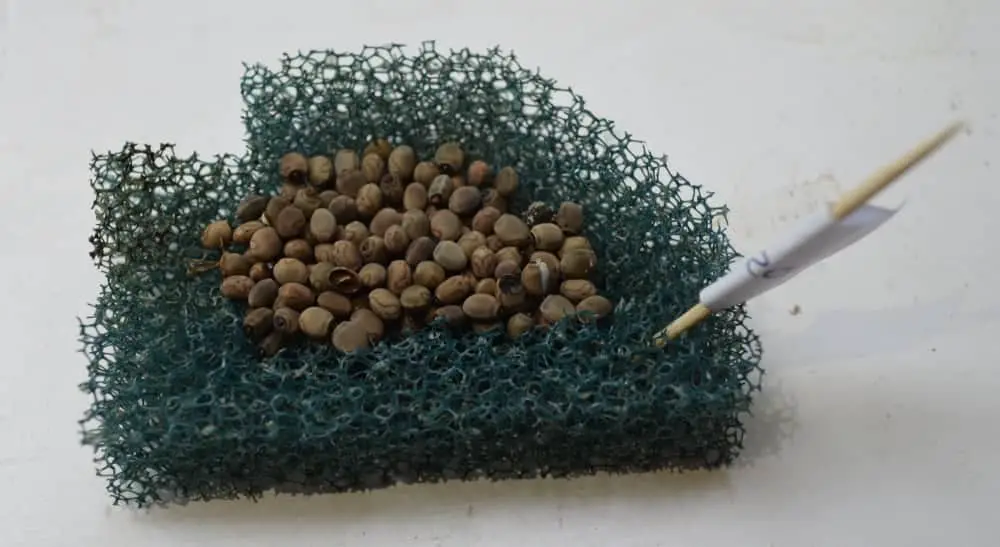
Another method that we often use as a clean method for species that drop the eggs on the ground is placing the eggs in cups made of aquarium filter. These cups are placed on a dishcloth that is kept moist. This way, the incubation enclosure will stay clean, and mould does not reach the eggs that quickly when it appears.
For species that bury their eggs, you should rebury the eggs in the incubation substrate again. A substrate that works well to bury the eggs is vermiculite. You can use a layer of around 2cm (0.8″) and lightly burrow the eggs with the operculum facing upwards. You make it yourself easier if you place a shallow or small bowl or cup where you put the substrate with eggs in.
For species that pierce or glue the eggs, you can move and place the material where the eggs are attached to in the incubation container. If the eggs are attached to or into a plant that is too large, cut out a smaller piece of the plant so it will fit in the smaller incubation container.
For larger setups, we like to use cups that contain eggs from the same collection date. We collect eggs around every 3 or 4 weeks. On each cup is written the date of the day the eggs are collected and gives more insight in the incubation length.
Incubation conditions and taking care of stick insect eggs
Besides a proper incubation container, you need to create optimal conditions for the eggs to hatch. The conditions discussed below are general values applicable to many of the phasmid species. However, you should always check for the best conditions of the species you want to breed.
Temperature
We breed most of our stick insects at a temperature between 20°C and 25°C (68°F and 77°F). This temperature range is in most homes equal to room temperature and doesn’t require any additional heating. Avoid temperatures above 27°C (80°F) or below 18°C (64°F). However, a temperature drop during nights is natural and even healthy (in the wild, it is not constantly the same temperature during day and night, too).
Make sure you don’t place the container in direct sunlight to prevent overheating of the eggs. Above 30°C (86°F), what it quickly becomes in full sun, is fatal to the embryo. Be careful in the summer months that the temperature will not rise to these extremes.
Humidity
For a good development of the eggs, the eggs require some level of humidity. Prevent to keep the eggs too moist. If you occasionally moisture the substrate (vermiculite, sand, dishcloth or kitchen paper) will be sufficient. Start with once every week as an average guideline. Adjust the frequency when necessary. Misting frequency highly depends on the ventilation of the container. Let the substrate dry up entirely before spraying again. It is not good for eggs health if they are continuously kept wet. Also, it is better that you don’t sprinkle directly on the eggs, but only on the substrate.
Also, mould will start growing when the container is kept too wet or continuously wet. Moulds start growing more quickly when the humidity rises above 75%. Also, provide enough ventilation. When the airflow is too low or non-existing with a humid environment will cause mould to proliferate.
A humidity level between 60% and 75% would be perfect for most of the species. It is better to be on the lower end of the range than on the high end. Some species from drier and more arid environments (like ) should be kept at a lower humidity level between 50% and 65%.
Lighting
Every stick insect or leaf insect need some light, also for the development of eggs. If you don’t have natural light coming in from a window (again, don’t place the enclosure in direct sunlight to prevent overheating) you should install some artificial light in the room or at the container. LED lights are perfectly fine for this purpose because they don’t radiate any heat, which will unnecessarily heat the enclosure.
Some species are known to be triggered by light when they hatch. For example, species of Phyllium will often hatch in the early morning. A day-night-cycle is beneficial or even required for proper egg development. At least none phasmid species seems to be harmed by providing light-cycles, so what do you have to lose?
Minimize the disturbances
It is essential to choose a location to breed your stick insects (and even keep the adults) where to is a minimum of disturbance. Switching of room lights on and off, a lot of vibration from humans that rush by or when kids ran along, or playing of (loud) music may be very stressful to embryos. Although species can be quite tolerant to vibrations and sounds, it would be good to prevent them and minimize the disturbance where you breed your stick insects and leaf insects.
Incubation length of eggs
It is difficult to pinpoint the incubation length of phasmid eggs and greatly vary between species. Depending on the species the eggs hatch between just 2 months and up to 14 months. Many factors influence the length of incubation. These factors are:
- The stick insect or leaf insect species and its size. Generally, the larger the size, the longer the incubation length, though this is not always true.
- The conditions of the incubation container.
- If the eggs are produced after mating or by parthenogenic females, which often takes longer than after mating.
You have to be patient. When you keep your eggs in good condition, you will soon see tiny nymphs walking around in your incubation container. After hatching, it is time to take care of these nymphs and raise them to adult size!
Taking care of stick insect nymphs
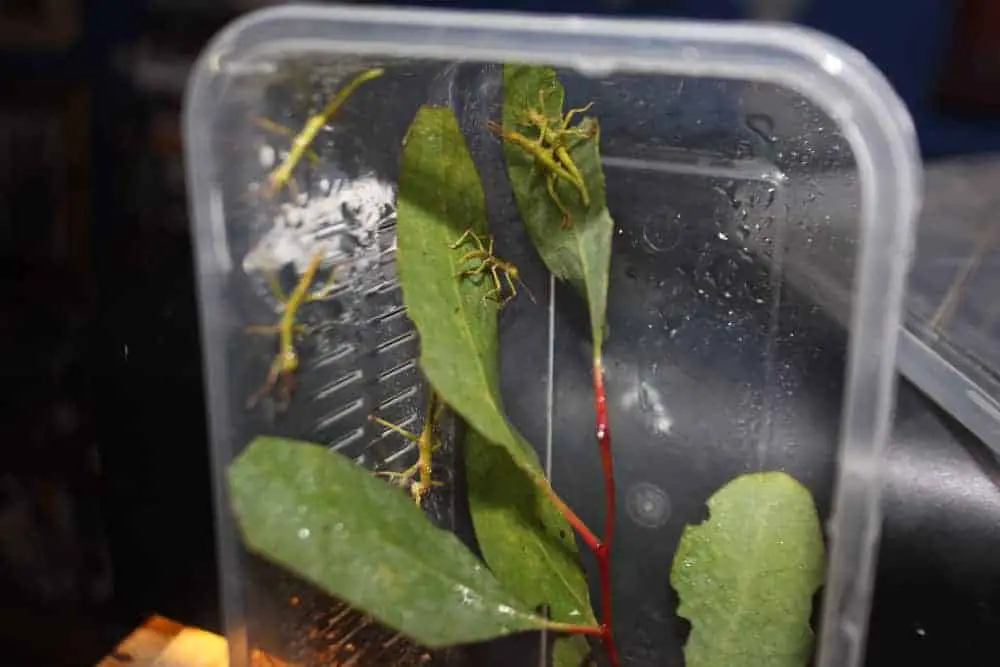
Check your incubation container daily if there are new nymphs hatched. Newly hatched nymphs should be quickly moved to a suitable rearing enclosure. I prefer to use a ‘Exo Terra Nano Tall 20cm x 20cm x 30cm (8″ x 8″ x 12″)’ enclosure or similar enclosure types.
Newly hatched nymphs are very delicate and fragile. To move them, it is better to let them walk onto or into something like a twig or a cup than handle them by hand. When handling these tiny nymphs, with just a bit to much pressure or when falling off your finger/hand will injure your newborn phasmid.
You should keep the newly hatched nymphs in the rearing enclosure eat least to L2 (after the first moult). We often keep them even up to L3 in the rearing room, before placing them in the enclosure with the adults. Nymphs can still be quite fragile, especially after moulting. So it absolutely advisable to have them a bit larger and stronger before placing them back with adults.
Avoid overpopulation inside the enclosure. That goes for both the rearing enclosure as for the enclosure with adults. Overpopulation may cause stress, problems during moulting, and nibbling/chewing on others (some sort of cannibalism). Also, keep only one phasmid species per enclosure to oversee better the condition and development of your group and nymphs.
Feeding nymphs
Get newborn nymphs eating for the first time can be a challenge. This step is maybe one of the most difficult in the process of breeding stick insects and leaf insects. Some species of nymphs start eating easier than others.
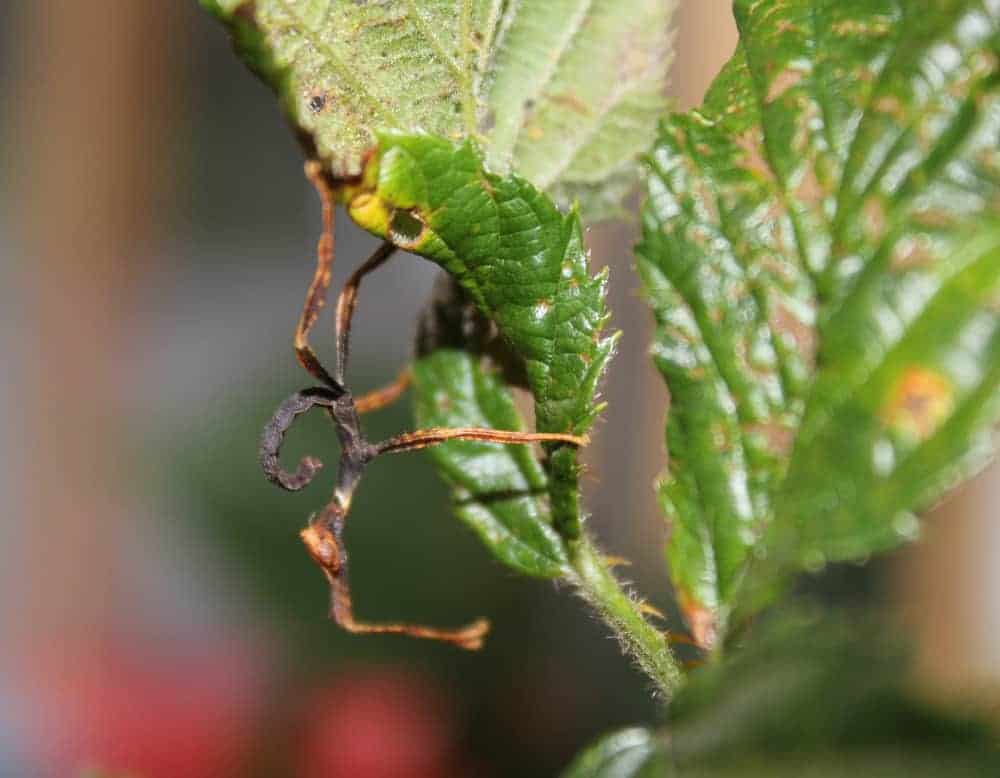
Which plant is best to feed will highly depend on the species, but for many species, bramble works very well and is well-accepted by nymphs. Other plants that I also have good experience with are raspberry, rose and oak leaves.
You can help freshly hatched nymphs by cutting off the leaf margins of the food plant. They will feed much easier and more steady when you do this. You can also keep newly hatched nymphs together with older ones so that the older nymphs will make a start on the leaves, and the newly hatched ones can easily eat on the places where there is already eaten from.
You can keep food plants longer fresh when placing them in a bottle or vase, but you should cover the top so that small nymphs don’t fall in that easily and drown. Also, to provide opportunities for nymphs to drink, you should spray the leaves you feed with water before placing them in the enclosure.
Cleaning the enclosure
Try to work neat and clean when rearing nymphs in the rearing enclosure. Remove uneaten plants and fallen leaves, remove old shed skins and prevent an excessive amount of frass/droppings. Basic cleanliness is recommended, but you don’t need to be too fussy about cleaning.
We use enclosure rotation, where after one enclosure is empty and reared every newborn nymph, we completely clean the enclosure before use again for the next batch of newly hatched nymphs. In the meantime, newborn nymphs are raised in another enclosure, and so it rotates on and on.
Share this page!