Crickets are maybe the most common and most popular feeder insect there is. They are nutritious, easy to feed and eaten by many animals like bugs, reptiles and amphibians. If you are tired of visiting the pet store regular to buy more crickets, maybe you should consider breeding your own
In this article, we focus on breeding crickets for your pet animals. If you make a little preparation, you can start your own self-sustaining cricket supply with little upkeep and costs.
Why should you breed crickets at home?
- Crickets are rather easy to breed with little effort
- Breeding and raising crickets is pretty cheap
- It cost little effort to be successful in breeding crickets
- Always have different cricket sizes on hand to feed
- You can make them a very nutritious feeder insect
- You can make your own limitless supply
Now you may think, why did I buy them in the first place? But it is important to make these notes from the beginning, so it is a well-thought choice and that you’ll know where you start on when breeding them.
If you have a single pet that not eat many crickets, it is not worth the effort to breed them yourself. Also, consider that crickets make a chirping noise continuously. So you’ll need a place that is specially used for this purpose and where the noise doesn’t mind anyone. Also, consider that crickets are rather quick and can jump, so escapes are more common than, for example, cockroaches. In this guide, we talk about cricket prevention. Finally, crickets are, at least in some countries, relatively cheap to buy.
So you’ll need to decide if you want to breed them in the first place. But with a bigger pet animal collection, it becomes quickly beneficial to breed them yourself. Let’s explore how to breed and raise crickets in this how-to guide.
Common species to breed as feeder crickets
The breeding method below will work on many cricket species. There are more than 900 species of “true crickets” described. However, there are four species of crickets that are commonly used as feeder crickets:
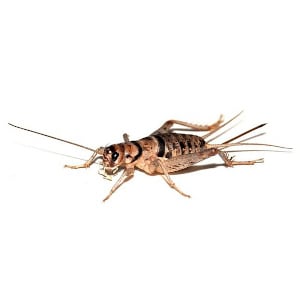
Banded crickets
(Gryllodes sigillatus)
Banded crickets are one of the more popular species of feeder crickets. They become a bit bigger and have a higher yield. These crickets can’t handle cold (which can also be a benefit). They are fast and can also jump quite high, and are most likely to escape once a while when cleaning the enclosure.
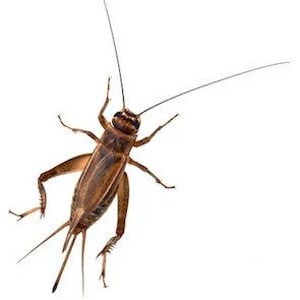
House crickets
(Acheta domestica)
These crickets are easy breeders and make them more cost-effective. It is a common cricket used as a feeder insect. This species is often used, at least to start with, breeding crickets. They are easy to keep and breed.
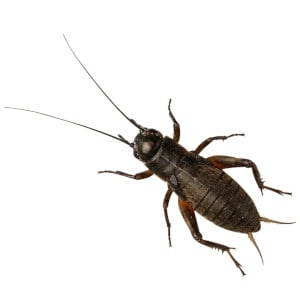
Black field crickets
(Gryllus bimaculatus)
These crickets are slower compared to the other species. They are also meatier and ideal for feeding larger animals. However, black field crickets can be quite aggressive and are not suitable to feed smaller pets. They are also very noisy.
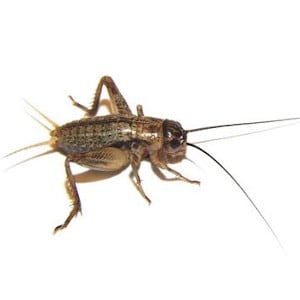
Jamaican field crickets
(Gryllus assimilis)
These crickets are much quieter, and of this reason makes it a popular species to breed with. They are also rather meaty, but can also be a bit aggressive towards smaller pets. However, they are not as aggressive as black field crickets.
It does not matter that much which cricket species you use for your breeding colony. Some have other benefits over the other. Choose a species that you think suits you best.
How to house your cricket colony?
Crickets don’t need much to be happy. They can survive in almost any enclosure you can think of. But they do require proper housing to breed. Housing a breeding colony is different than housing your pet animal. A suitable type of housing makes breeding faster, easier and also helps to prevent escapes. So let’s look at how we should house our cricket breeding colony.
Enclosure type and size
Best would be to use a plastic container to house your crickets. The size you should take ultimately depends on the size of the colony. You’ll need a container that can be easily cleaned and maintained and is not too crowded. When there are too many crickets in a confined space will eventually eat one another to reduce the competition. And we don’t want that!
QUICK TIP: Crickets breathing through a series of small openings on the outside of the body called “spiracles”. If you do not provide enough space, they can’t breathe and may suffocate.
To help you decide which size would be best, it can be said as a guide, that 50 litres containers can house colonies up to 500 crickets. At least with enough furniture.
Always buy a container with a lid. Without a lid, you can make sure crickets will regularly escape. Also, choose a container that has high sides with smooth plastic. Smooth sides also make escapes, when opening the lid, rather difficult.
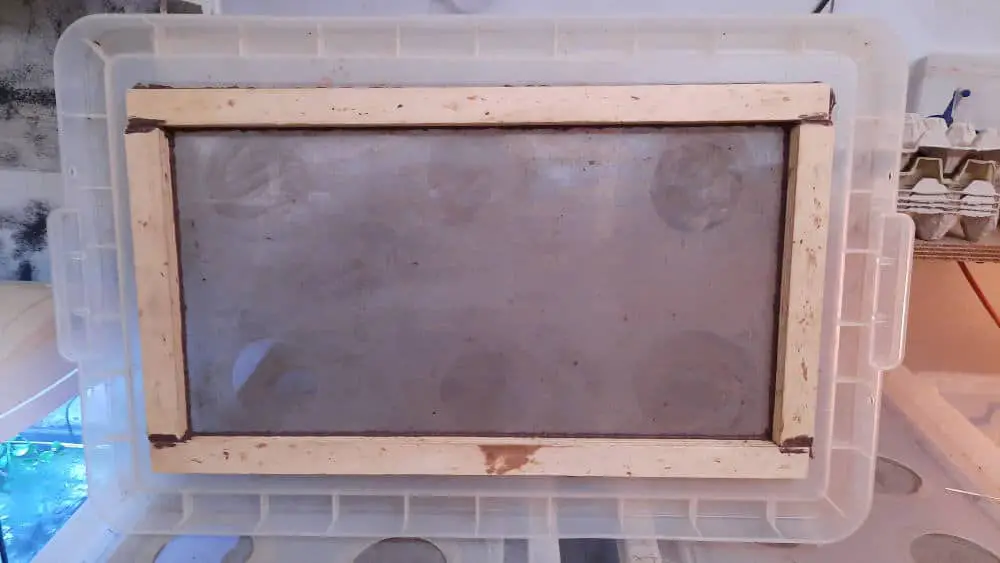
Always make sure there is enough ventilation. When buying a plastic container, you should cut holes in the lid and seal them with metal fine wire mesh (also sold as metal mosquito screen). Absolutely make sure you have enough ventilation holes.
To manage breeding colonies, we recommend having at least two of these containers — one to house your breeding colony and one to hatch and raise your young crickets.
Substrate and furniture
The container doesn’t explicitly need to have substrate. However, when you do, this substrate needs to be dry and stay dry. A particular good product to use for this purpose is vermiculite. Layer the floor with 2.5cm to 5cm (1″-2″) of vermiculite. This substrate keeps the container dry to prevent bacteria and mould growth. Vermiculite has one other significant benefit that it absorb and reduce odours so that your container won’t smell that bad.
Crickets don’t need that much, but you can use egg flats as furniture to increase the total surface of the container and create shelter for the crickets. Especially with larger colonies, this works very well. Crickets do like the dark and small spaces, so we should provide this in the container as well. However, these egg flats get dirty and soft in a while and need to be replaced regularly. Also, don’t make the egg flats structure too high so they can’t easily jump out the enclosure when opening the lid.
GOOD PRACTICE TIP: You can use a strip of clear packing tape around the top edge of the inside. It makes escapes rather difficult because it is too slippery for the crickets to climb.
Laying bins
Crickets start breeding as soon as you provide a suitable substrate that is humid. The laying bin should provide the best conditions for your crickets to inject their eggs in. Without providing a proper laying bin, female crickets won’t lay any eggs.
You can use a small plastic container or box that is around 5 cm (2″) high. Fill this box with a substrate of cocos-humus or cocos-ground. This type of substrate keep the ground loose and is better to hold moisture. Make sure that the substrate you use is free of any fertilizer or pesticides.
You can place you laying bin on top of the vermiculite or dig it in. When you dig it in, make sure the sides of your laying bin are higher than the substrate of the container.
GOOD PRACTICE TIP: You can put a screen on top of the soil to prevent crickets from digging in the laying bin, or eating freshly laid eggs. Females can deposit the eggs through the screen using their ovipositor (the spike at the end). Also, drill some tiny (1mm – 2mm) holes in the sides so that excessive and accumulated water can leave the laying bin to prevent drowning of eggs and growth of bacteria and mould.
How to create an favorable environment for breeding?
When you have proper housing, you’ll need to make sure the crickets live in the best environmental condition to stimulate breeding and keeping them healthy. To have the best breeding result, you’ll need to keep the colony at the correct temperature and humidity.
Temperature, heating, and light cycle
To promote crickets to breed and the incubation of the eggs, you’ll need adequate heating. Heating can be provided using different methods. There are roughly three types of heating: top heating using a light bulb or reptile heater, bottom heating using a heating pad or heat cable, or ambient heating.
If you use a large breeding setup using multiple breeding colonies in several containers, it would be most easy to use ambient heating. By using a heater, you can heat the entire space to keep all colonies at the correct temperature.
If you want to heat the container separately, it would be best to use top heating. By placing a light bulb, reptile heater or ceramic dark heater, you can create the perfect temperature. I prefer this method above bottom heating because the latter more easily and faster dry out the laying bins (and prevent eggs from hatching).
Although you can keep crickets alive in a temperature range between 13°C and 38°C, crickets do best when you keep them at a temperature between 27°C and 32°C (80°F-90°F). Which wattage of light you’ll use conclusively depends on the size of the container and the ambient temperature. You’ll need to experiment with different lights to find the best one that suits in your situation.
Humidity
Humidity needs to be kept very low. It would be best to keep the relative humidity between 50% and 70%, preferably on the lower end of the range. If humidity is too high will cause problems like unwanted bacteria and mould growth, diseases and they just don’t breed well in humid conditions.
To keep the enclosure dry and low in humidity, you could best place the container in a low humid environment and colder environment, and heat it to the right temperature. By heating it enough, it will create a proper dry environment. Also, feed more dry food and stay away from very wet food (think of tomatoes, cucumber, etc.).
GOOD PRACTICE TIP: Make sure the enclosure isn’t too humid. You’ll need to keep a water dish for drinking, but try to keep humidity low to reduce cricket mortality, mould, mites, and flies.
The only place that needs to keep it humid is the laying bin. You can sometimes spray or sprinkle a tiny amount of water there, but just only there!
Climate monitoring and automation
To keep track of the environment would be a good habit. I can recommend monitoring the environment using a thermometer and hygrometer (often sold and available as one device). This way, you make sure you maintain the best environment for your cricket colony.
You can also use timed switches or thermostat switched to regulate the temperature. These are widely available and also rather cheap to buy (where thermostat switches are a bit more expensive). Maybe it is a small investment, but it will reduce time, effort and problems in the future.
Cleaning the enclosure
A clean environment is a healthy environment. It is no difference for crickets. So you’ll need to clean the enclosures on a regularly base and prevent that the enclosure becomes messy.
Don’t feed more than they eat, and remove uneaten food always after 24-hours. You can use food bowls to keep the food in one place, so you don’t have to clean the whole enclosure each time (especially annoying when using a substrate).
You should also remove dead crickets and excessive faeces regularly (best would be to do this daily). Crickets will eat deceased individuals and may spread bacteria affecting your colony. When cleaning the enclosure, never use chemicals of any sort. Crickets are very susceptible to chemicals, and this will quickly result in dead animals.
GOOD PRACTICE TIP: A second container that has a similar size will come in handy. You can move the crickets from one container to the other container while one is being cleaned.
Enclosures that are used to hatch eggs and provide the crickets you feed to animals should be cleaned, in total, when they are empty. This method works well in an enclosure rotational system. When using a single container, you can move the colony to a clean container and then easily clean the container that was used.
What makes a proper cricket diet?
Proper food is important to keep your crickets alive, healthy and nutritious as a feeder insect. As a primary food source, you can use oatmeal, cornmeal or a special cricket/insect food. Provide this type of food in a dish with low edges, so it won’t spread through the container but also is easy to access for the crickets.
Additionally, you may provide fruit or vegetables, like carrot slices, apple slices, and potato slices. Remove uneaten fresh food daily to prevent mould and that it will rot. Try to feed them foods that you also would provide to animals, because ultimately the crickets will be the food source for your pet.
QUICK TIP: Remember that the nutritional composition, as well as the taste, depends a lot on what you feed them.
Do crickets need water to drink? Yes! Drinking water is also essential to your crickets to keep them alive and well. However, crickets are notorious for drowning very quickly, even in shallow water. So you’ll need to provide water in a different way. One way is to use an inverted bottle/water dispenser. Make sure that where the water is coming out is still not able for crickets to drown.
Another way is to provide a dish with a wet sponge or some sort to prevent crickets to drown while sucking up the water. Make sure you’ll refresh this water source regularly so mould and bacteria will not grow in there. You can also use stones and wrap them with sponge paper. However, when you do that first clean the stones to remove all dirt. This method is often used at larger cricket farms.
How to manage your breeding cricket colony?
When you have done all the above, you’ll have a proper setup to start breeding crickets. In this section, we look at how we can easily breed them and that you’ll have a high output. But first, it is good to know how the life cycle of crickets looks like.
Cricket breeding life cycle
Crickets have three stages in their life: egg, nymph, and adult. Newly hatched nymphs are called pinheads. The total lifespan (from egg to death) is around 8 to 12 weeks. It takes approximately 5 weeks that crickets reach the adult stage. The lifespan depends on the environment condition you’ll keep them.
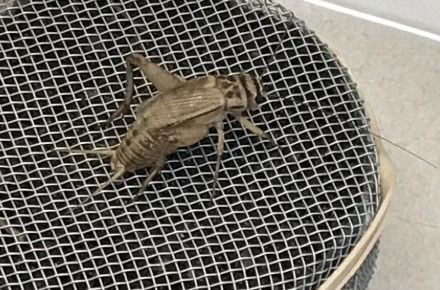
A female uses her ovipositor to lay eggs. They will do this almost continuously, as soon as a damp substrate is available. After mating, a female can easily lay over 100 eggs, sometimes even around 200 eggs, during her life.
Eggs
Eggs are tiny and fragile. The egg will stay in the substrate, and after around 14 days it will be developed into a small nymph: a pinhead. It will dig out of the substrate immediately.
Nymphs
As soon as they hatched, nymphs look like small copies of adult crickets, except they have no wings and females have no ovipositors yet. To grow, they need to moult, and every time they grow a bit larger. Nymphs will moult between 8 and 10 times. They don’t grow between moults.
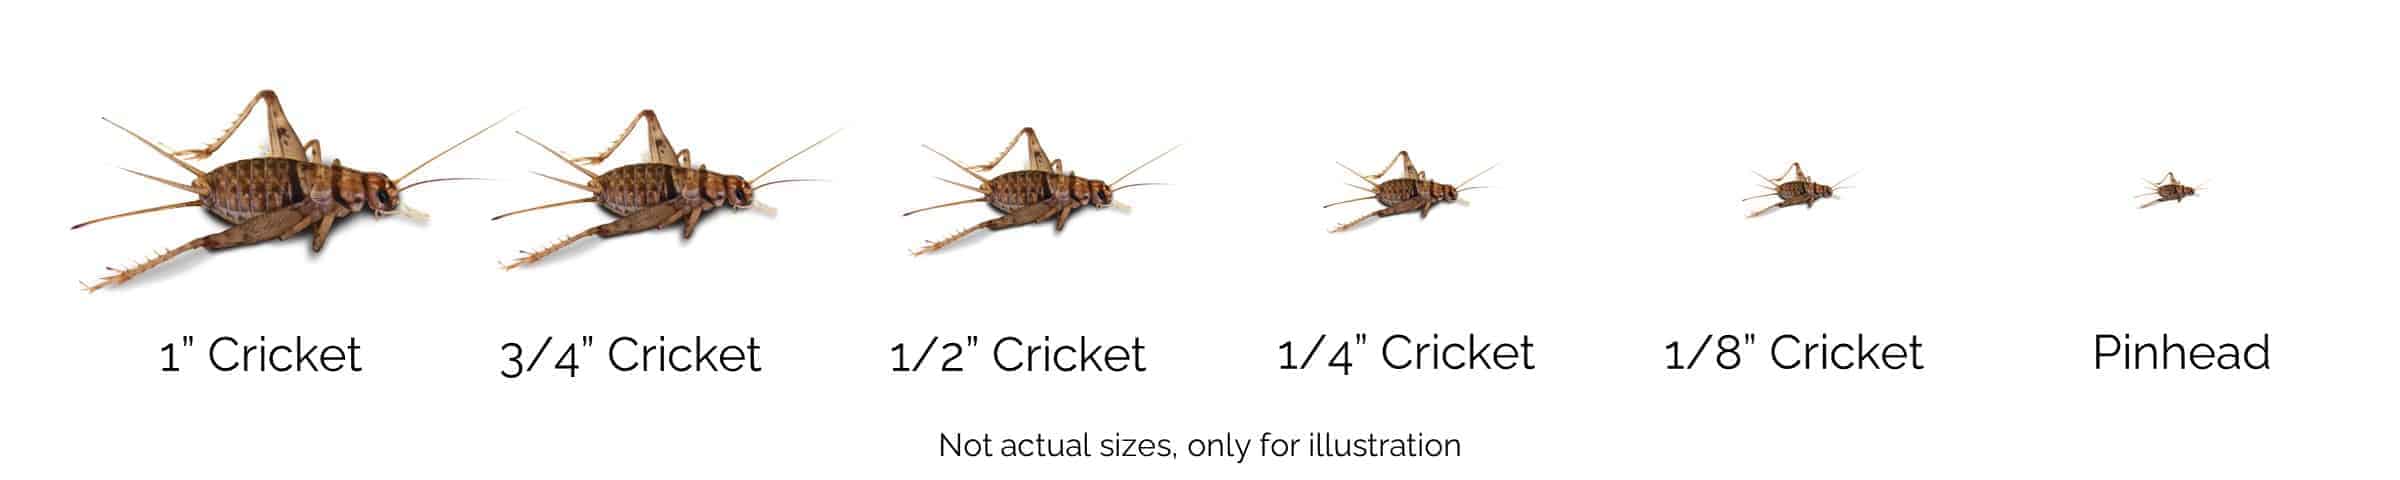
It takes around five weeks for nymphs to grow from pinhead to adult size. At every size, you can feed them to other animals, and for some animals, it would be better to provide them with smaller nymphs instead of larger or adult ones.
Small nymphs can become prey to larger adult crickets. So when you want a high breeding output, you’ll need to keep newborn nymphs separately from adult crickets.
Adults
At this stage, when around five weeks, the exoskeleton becomes quite rigid and coarse. In this stage, the cricket is also harder to digest for some animals. Once a cricket reaches adulthood, it only focusses on two things: eating and mating. Males try to attract females with the chirping sound they make with their wings. After mating occurs, the female will search for a suitable spot to lay her eggs, and the life cycle starts again. Adult crickets will live around 6 to 7 weeks. Small variations in lifespan occur between cricket species.
Cricket farming – Breeding the easy and simple way
When you followed along, you have already set up a proper container with furnish (and substrate), and a laying bin. Now you can place in your breeding colony. Don’t start with adult crickets, but buy crickets that are at 1/2 of their nymphal stage (sized 1/2″). Adults that are sold have often bred already before you get them, and may live only a couple of weeks.
When you give your founder population the time to breed, you’ll need to remove the laying bin into a separate container to hatch. Adults may eat pinheads and reduce the number of crickets to feed.
A good system is to work with container rotation. It keeps the development and management of your crickets clear and straightforward – the ultimate goal of cricket farming. Let me explain this system.
You’ll keep your breeding colony in the first container. After 7 to 10 days you’ll remove the laying bin to a new container and replace it with a new laying bin. In this second “raising” container, you’ll raise the eggs to 2/3 of their nymphal stage. You’ll repeat this every 7 to 10 days and place the laying bin with eggs in a new “raising” enclosure. Therefore you’ll need around 6 “raising” containers.
After 3 or 4 weeks, you’ll place them in a new large container that can be labelled as the feeder container. From this container, you’ll feed your animals, and from this container, you’ll replace died adults from your breeding colony.
It depends on the space available and the amount of containers you can place if this system works for you. You can also use a variant of this system, in that you’ll place the first and second laying bin in one “raising” container, and the third and fourth in the next one, and so on.
Small and large breeding setups
Depending on how many crickets you want to feed, you can have a minimal setup or an extensive setup. But remember, crickets will breed relatively easy, and before you know you will have more crickets than that you can feed. Don’t panic. You can consider to sell them to other local pet keepers.
To give you a guide, a breeding colony of 50 crickets in optimal condition produce 2000 pinheads over their breeding cycle (12 weeks). So, maybe it would be better to start with a breeding colony of 20 crickets, so you’ll have around 70 crickets a week to feed. Much smaller breeding setups are almost non-profitable above buying them. Especially in the case when you have one or a few pet animals
When you want a large breeding setup, it would be good to have multiple breeding colonies instead of one big breeding colony. Smaller colonies are easier to keep, care for and manage.
Now it’s up to you!
Cricket breeding and farming to use as feeder insect is relatively easy as you can see. Start to set up your first breeding container and raise your own feeder crickets without continuously going to the pet store. Maybe, you can even sell some crickets that you have bred to other pet keepers!
If you have any question about keeping, caring and breeding crickets, please don’t hesitate and ask them. You can contact me on the contact page. I like to hear from you and help you where I can!
Other bugs you can keep as a pet
Although cockroaches are amazing pets, there are many other bugs that make great pets too. Check out the bugs below, maybe you find them even more interesting to keep.
– Praying mantises
– Millipedes
– Beetles
– Ant colony
– Tarantulas
Share this page!
Breeding Crickets FAQ
Suggested Reading

Breeding Or Buying Feeder Insects [What’s The Best Option?]

Do Dubia Roaches Smell?
