There is much to do with a substrate for millipedes. But oftentimes the importance of the substrate is a part that is underestimated by keepers that start this new journey. And I can imagine it might be confusing because of the myriad of products available. In this article, we cover what you should know about the substrate for millipedes.
What you should know from the start is that the substrate means life for millipedes. Therefore, you can say that the substrate is the most important feature of a millipede habitat. A qualitative substrate keeps your millipedes alive, healthy, happy and stimulates breeding, and it doesn’t have to cost that much.
But there is much more to learn about the substrate for millipedes. So let’s dive into it, quite literally actually.

The important role of the substrate
The substrate means life to millipedes. Although a heavy statement, it becomes more clear why that is when we look at the important role a substrate plays in the life of millipedes. We can determine 7 functions that benefit your millipede.
Providing food
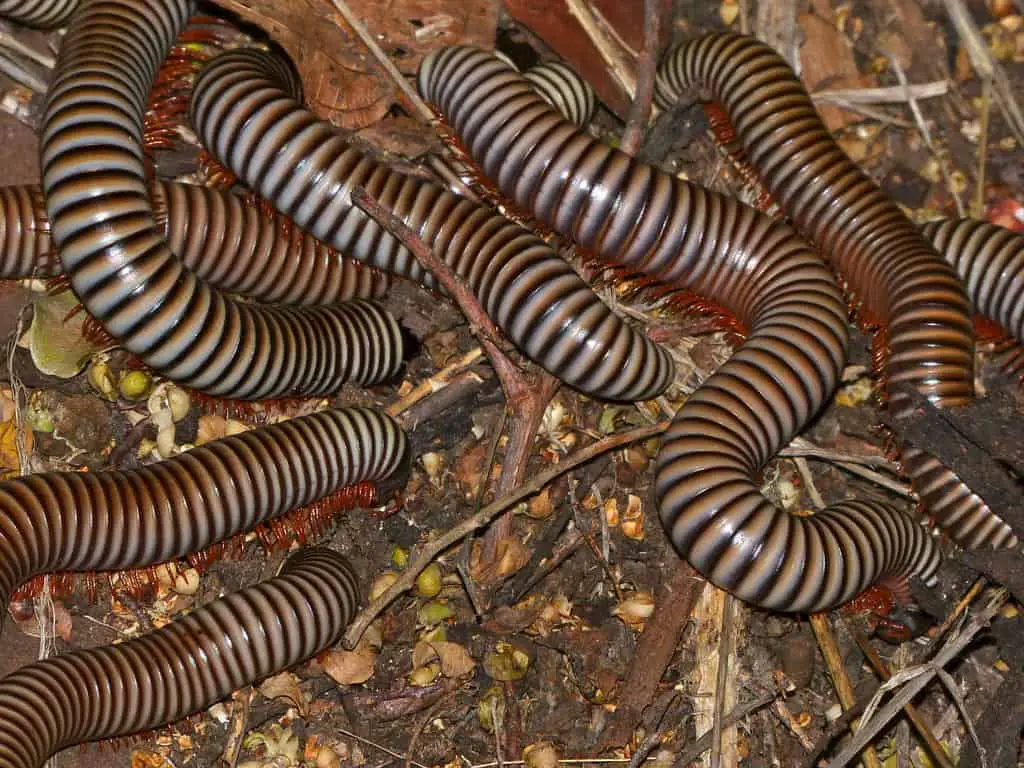
A substrate provides the primary food for your millipede. Millipedes are detritivores and can survive solely on the substrate. At least, when it is of enough quality.
Detritivores mean that millipedes live on decaying organic matter: rotting leaves, rotting wood, plant roots and other decaying matter. A large part of their lives they scour the forest floor and digging in search for food. Their mouthparts can only nibble on soft foods, so the leaves and wood need to be pretty rotten.
The substrate is full of important and necessary nutrients that keep your millipede healthy.
A place for millipedes to rest
Millipedes use the substrate to dig themselves in to rest. When they are burrowed, they are protected from being predated on. They regularly curl up, so the hard outer exoskeleton protects the more vulnerable legs and underside of their body.
Don’t dig up a millipede unnecessary. This is very stressful for a millipede. Just leave them be, they will come above ground eventually to walk around and nibble on other food sources you should provide.
If you don’t see your millipede after two weeks, you may consider carefully dig it up. You could also use a flat brush to carefully remove the substrate without harming your millipede (especially relevant when moulting).
A place for millipedes to moult
They not only dig in to rest. They also burrow themselves to moult. Moulting will usually take place within the substrate, and there are good reasons for that.
Just like with resting, the substrate covers them and protect them during this delicate process. Not only is this an energy-costing process where they are unable to protect themselves, but after the actual moult, the new exoskeleton is still soft and needs to harden first.
The other reason is that the moisture (higher humidity) helps to get rid of the old skin. The substrate is (or lat least should be) a more humid environment to make the moulting process easier.
Because the moulting process is a delicate and stressful process, you should not dig up millipedes. The chance that your disturb moulting millipedes or harm just moulted millipedes can cause permanent damage to them, or may even cause it to die.
A place for millipedes to lay eggs
Millipedes use the substrate to lay in their eggs too. Some millipedes make small underground chambers to lay the eggs, and others disperse them over the whole surface. The method your millipede use to disperse their eggs depends on the species.
The substrate (needs to) have the perfect conditions to hatch millipede eggs. The moisture keeps the eggs hydrated, and the substrate protects the eggs from being predated or damaged by weather influences (rain, temperature, wind, etc.).
Some millipedes lay their eggs in small capsules made from residues of eaten substrate. The size of the capsules depends on the size of the millipede, but are often easy to spot onto the nice round/oval shape of it.
A place to raise baby millipedes
The substrate is also used as a nursing room for your newly hatched baby millipedes. These small millipedes are small and fragile, so the substrate protects them from most predators and weather. Often you see small millipedes search for covers like log pieces, rocks or other objects in the enclosure.
The substrate provides moisture to hydrate, food to keep them healthy and humidity to moult and grow. It provides all the features to make your baby millipedes grow and develop to mature adult ones.
Regulate the humidity
We mention it already, but a substrate creates a buffer to regulate the humidity in the habitat. The substrate will absorb moisture when it is sprayed (in nature when it rains) and release the moisture slowly when it dries out.
This humidity is important for a healthy life of millipedes. When humidity is too low in the enclosure, it causes millipedes to dry out. Therefore, millipedes will dig in themselves more and more to keep hydrated that way (however, you don’t see your millipedes anymore and will give problems in the long run).
Isolate and maintain the temperature
A substrate will act the same as a foam that covers a water pipe. The substrate has an isolating function which keeps the temperature more stable, at least inside the substrate. But it also partly isolate your enclosure, so it maintains the temperature longer.
How it works is that temperature slowly moves with the ambient temperature. It takes longer before the substrate is cooled off, and it takes longer to warm up. It stabilizes the temperature, which also benefits the resting millipedes, baby millipedes and egg development.

What makes a good quality substrate
We already mentioned ‘a good quality substrate’ a couple of times. But what makes a substrate of good quality and what components and where does a substrate consist of? A good substrate for millipedes consists of two base components: a base component (filler) and a food component (feeder). Let’s have a closer look at those components.
The substrate base component
The base component of the substrate — sometimes called ‘filler’ — creates the volume of the substrate and its moisture absorbing capacity. This component doesn’t have and doesn’t need a high nutritional value. It is the volume that is the value. Millipedes are therefore able to dig in to rest, moult, or lay eggs.
For this component, there are three products commonly used: Coconut fibre, compost and potting soil.
Coconut fibre is in my experience the ultimate winner of these three. It is a clean product, has good moisture absorbing and isolation features, is soft and easy for millipedes to dig in. A large benefit is that it has a consistent quality and always has the same composition.
Others products that can be used as well are compost and potting soil. Although it contains a higher nutritional value for millipedes, it also highly fluctuates in quality and this nutritional value is not enough to use as a food component.
So, my recommendation is to stick to coconut fibre for the base component of your substrate. When choosing potting soil or compost, buy it without any fertilizer or additives (but choose organic products instead).
The substrate food component
The food component is an evenly important part of the substrate and is — as the name suggests — the primary food source for millipedes (also and especially for baby millipedes).
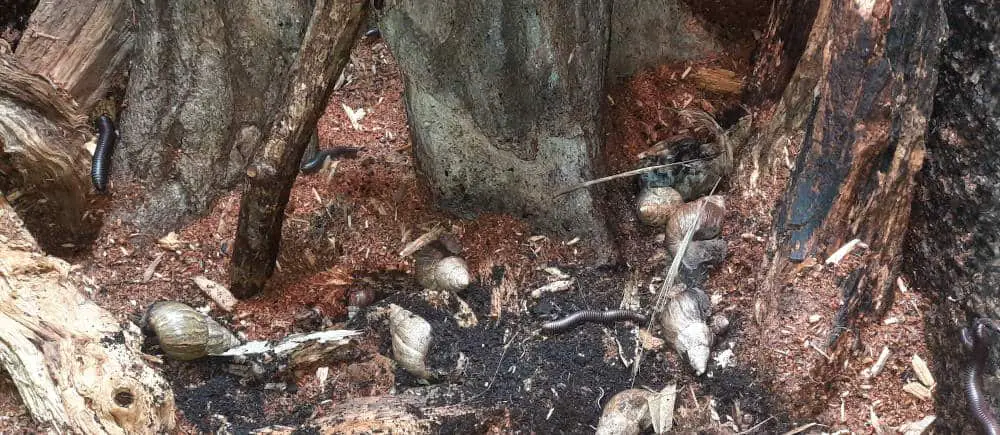
Products that can be used as a food component for millipedes include rotten wood, rotten leaves, sawdust, or the combination of these products. All these need to be from hardwood tree species. Hardwood can be found in abundance in almost all countries. In the United States alone, 40% of trees consist of hardwood tree species. The most popular tree species to use are oak, birch, maple and aspen.
Consider that millipedes can only nibble on these products. So when we talk about rotten wood, this wood needs to be very soft. To visualize it, you’ll need to be able to scrape off pieces of wood with your fingernail. If you can do that, you know the wood is good to use for your substrate.
You can find wood and leaves just at your local park or forest. When you search for wood, go for the nice white rotten pieces that lay on the forest floor. If the wood is dark brown or black, and wild insects avoid it (not seen on the piece), you should definitely avoid it too.
When in search of leaves, try to use the layer of leaf litter that is between the top and the last layer of rotten leaves before the dirt (probably the leaf litter that has fallen the (half)year before). These leaves work the best. But some leaves from the top layer are also useful. It is recommended to have at least decaying leaves in your substrate.
When collecting products (wood, leaves) from nature, there is a possibility that you transfer some (unwanted) insects with it. To prevent that from happening, you could freeze the products for several days to kill most pest insects. However, freezing will not always kill all, so it would be better to cook it at a temperature around 65°C to 90°C (150°F-200°F). Fresh sawdust does not have to be frozen or cooked.
Substrate additives
You can add some additives to these two components, for example, to improve the moisture absorbing capacity or the airiness of the substrate.
Products that you may consider to add are live plants, mosses, vermiculite, perlite, sand, and calcium.
Live plants and mosses can contribute to the food component and the esthetics of your enclosure. Some millipedes will eat from it, and others use the plants to explore or hide. At least it makes your habitat appealing. It can also contribute to maintaining the humidity of the enclosure (especially mosses can help with that).
Vermiculite and perlite are often used in small quantities to help maintain and increase the humidity and moisture content of the substrate.
Sand can be added to create a more airy substrate. You may want to make your substrate airier to prevent compaction, which is more susceptible to become soaking wet substrate and the growth of fungi/mould.
Products that should be avoided
Some products should be avoided at all cost. They will not benefit your millipede, or will even harm or kill them.
When buying potting soil or compost, make sure they come without chemical additives and fertilizer. Try to find the organic products, or choose coconut fibre as base product.
Woodchips, gravel and pebbles should be avoided at all. They don’t contribute to any perks for your millipedes. They also can’t dig into these types of substrate.
Although vermiculite, perlite and sand can be used in small amounts to your substrate, never use these products to buildup your whole substrate. Millipedes won’t be happy and can’t survive long on these type of products.
We continuously talk about the use of hardwood for rotten wood and leaves. Although some softwood tree species can work, it is the risk that the wood pieces or leaves contain resinous sap, which will harm and kill your millipedes. Always avoid the use of pines for the same reason.
Steps how to make the perfect substrate mix for millipedes
The best substrate mix can’t (yet) be bought in the store as one product. Although there are some products available that claim that it is a complete product to be used as a substrate, I’m not completely convinced.
Next to that, they often charge high prices for those products. When you make your own mix, it is often much cheaper. Below is the way I make the substrate that I use for 10 years now, and which contributed breeding over 500 baby millipedes. There are more ways to create good quality substrates; I just share my experience.
What you need to make the mix
Products that I use to make the substrate mix and in which ratio are:
- 30% Coconut fibre (also called coir/ECO-earth)
- 30% Rotten wood (white rot pieces)
- 30% Decaying leaves (both from the previous year as recently fallen ones and keep those two separated)
- 5% Sawdust from untreated wood
- 5% White sand
- Some calcium powder/cuttlefish bones
Make the substrate mix
- I will use a large plastic container to mix the substrate. First, start with the coconut fibre and throw the necessary amount in the container. Next to that add chlorine-free water to it, so it becomes very damp (not soaking wet).
- Add to the coconut fibre 20% of the rotten wood and ½ of decaying leaves (the ones that are more rotten/smaller pieces that your collect from below the top layer). Break and crumble the rotten wood in smaller pieces.
- Hussle these 3 products, so it becomes an equal substance. At this point, you have already quite a good mix of a substrate. But let’s add some additives.
- Scatter the sawdust and sand over the substrate.
- Now we will add the calcium. If you use powder sprinkle it lightly over the substrate. If you use cuttlefish bones, you first need to crush it into smaller pieces (the smaller, the better). Scatter the crushed bones onto the substrate.
- Hussle it all in until you have an equal substrate mix. Your substrate mix is ready to use. If all went well, you still have the whole leaves you collected from the top layer and around 10% of rotten wood pieces.
Add substrate mix to the enclosure
It is time to add the substrate mix into the enclosure. You can equally distribute the substrate over the enclosure surface, however, try to make it a bit higher in the back of the enclosure to create some depth.
When you added the substrate mix, it is time to use the leaves and rotten wood. First, cover the whole substrate with the whole leaves so it looks like a forest floor. Then, add the whole pieces op rotten wood on top. Besides it looks great this way, these products can slowly decay and sink into the substrate. And these products help to create hiding places for your millipedes.
If you wish, you can add some (artificial) plants and mosses to it to your enclosure looks even more beautiful. Don’t add rocks or heavy stuff onto the substrate. These things will only compact the substrate and can even crush resting or moulting millipedes.
Additional recommendations for your millipede substrate
- First, let’s talk about the necessary volume of substrate you should add to your enclosure. You need to add at least a substrate layer of 2″ (5cm). Better would be to use around 4″ (10cm) of the substrate to create enough space and stimulate breeding. When you use a 4″ layer, you need a total of around 2.5 gallons (9 litres) for a small enclosure, 5 gallons (19 litres) for a medium enclosure and 10 gallons (34 litres) for a large enclosure.
- Add objects to the substrate (like cork and lightweight wood pieces) as hides for millipedes to rest or to moult, but also for millipedes to lay eggs or hides for small baby millipedes.
- Although millipedes can survive solely on a good quality substrate (depending on the food component), it is good practice to provide supplemental food items like fruits, vegetables and powdered food.
- A good quality substrate can last for months or even years, depending on how many millipedes you have in relation to how much substrate. Keep your substrate in good condition by misting it with water to keep it damp, and to add crumble pieces of rotten wood and leaves.
- When you see dirty spots or mould growth, do some spot cleaning and refresh the substrate wit new one (so it would be good to have some stock). It can be that you need to refresh your whole substrate. When removing the substrate carefully inspect for eggs(capsules) and baby millipedes. Never just throw the old substrate back in nature, but at least freeze it for a couple of days. It would be a bad practice when you accidentally release tropical millipedes in nature. When they survive, they can compete with indigenous species (and doing this is in most countries forbidden by law).
- Another way to go is to add a clean-up crew to the substrate. Some species can help to keep in your substrate in good conditions. However, because millipedes are detritivores themselves, a clean-up crew consisting of isopods can compete with your millipedes. They also may eat or damage your eggs or newborn millipedes. If you wish to add a clean-up crew, it would be best to add springtails to your substrate. They only feed on fungi, bacteria and are really small (so no competition to your millipedes).
What does a substrate cost?
But how much does a substrate for millipedes really cost? It obviously depends on which country you live and the amount of substrate you need to make. Add to that, that most products can be collected from nature, but can also be bought at some specialised stores.
We calculated that on average, 1 gallon of coconut fibre is around $3,00. Cuttlefish bones, where you can use one per 2.5 gallons, is around $1,00. The other products, such as rotten wood, rotten leaves, sand, and sawdust, can be collected for free.
In the table below, you can find the average price for creating a substrate mix for different sizes of enclosures.
| Enclosure size | Substrate volume needed | Price |
|---|---|---|
| – | 1 gallon / 4 litres | $4,00 / €3,35 |
| Small | 2.5 gallons / 9 litres | $7,75 / €6,50 |
| Medium | 5 gallons / 19 litres | $15,25 / €12,85 |
| Large | 10 gallons / 34 litres | $28,50 / €24,00 |
If you like to know more about the complete cost of keeping millipedes, I recommend you to check out the article ‘How much does a millipede cost — initial & yearly cost breakdown‘.
Share this page!
Suggested Reading

Giant African Olive Millipede [Telodeinopus aoutii] Care Guide

Life Cycle And Lifespan Of Giant Millipedes Explained
